
Disclosure: we may get a commission from qualifying purchases made through affiliate links in this post but at no additional cost to you.
If your check engine light has ever come on, you’ve probably wondered what exactly is wrong with your vehicle. Instead of spending hundreds at a mechanic for a basic diagnostic, there’s a much more efficient and cost-effective option — an OBD2 scanner. In this guide, we’ll walk you through everything you need to know about how to use an OBD2 scanner, explained in plain language and actionable steps.
What Is an OBD2 Scanner & Why You Need One
Think of an OBD2 scanner as your car’s personal translator and health monitor. OBD stands for “On-Board Diagnostics,” and OBD2 is the universal standard used in virtually every gasoline-powered car sold in the U.S. since 1996 (diesel since 1997). It plugs into a 16-pin port—usually under the dashboard near the steering column—and provides a direct line to your vehicle’s onboard computer system.
So why should you care? First, it saves you serious time and money. Before OBD2 scanners became affordable and widespread, the only way to find out why your check engine light was on was to take it to a mechanic and pay them to hook up their expensive scan tool. Now, you can do it yourself: plug it in, hit “Read Codes,” and get instant insight .
But the benefits go deeper than just diagnostics. A modern OBD2 scanner can:
- Read and clear diagnostic trouble codes (DTCs)—those cryptic alphanumeric codes that pop up when your engine senses something off.
- Display live engine data, like RPM, coolant temp, oxygen sensor readings, and fuel trim—valuable for troubleshooting or verifying a fix .
- Monitor emissions readiness, so you’re not caught off guard during smog checks.
- Support advanced features—like freeze‑frame snapshots, manufacturer‑specific codes, and even bi‑directional controls for pro-level diagnostics.
There are different types of OBD2 scanners, from budget-friendly handheld code readers to Bluetooth dongles that link to powerful mobile apps. Choose based on your needs—whether it’s basic code reading or in-depth diagnostics.
At the end of the day, learning how to use an OBD2 scanner isn’t just about saving cash on diagnostics. It’s about taking control of your vehicle’s health, catching issues early, and even learning how your car ticks—without waiting in a mechanic’s lobby.
Step 1: Locate the OBD2 Port in Your Vehicle
When you’re learning how to use an OBD2 scanner, step one is finding that magic port in your car—the gateway to real-time diagnostics. Let’s make this as easy as chatting with a friend under your dashboard!
1. It’s Inside the Car, Not Under the Hood
Since 1996 (and 2001 in EU), all cars have a standardized 16‑pin OBD2 port inside the cabin, not under the hood. This makes it accessible even when the engine is off.
2. Usually Under the Steering Column
The most common location? Beneath the steering wheel, close to the driver—either directly under or a bit off to the left or right . Grab a flashlight and glance under the dashboard near the pedals.
3. Other Common Spots
If it’s not obvious right under the wheel, don’t worry—other likely places include:
- In the driver-side footwell, above the dead pedal or next to the brake pedal
- Around the center console or passenger footwell
- Behind a plastic flap or cover that keeps it hidden from visual clutter
4. Shape & Pin Count Matter
It’s a trapezoidal 16-pin socket—two rows of 8 pins. Easy to spot once you know what you’re looking for .
5. If You’re Still Stumped
A few more tips:
- Run your hand along the underside of the dash until you feel the trapezoid shape
- Consult your owner’s manual—it almost always lists the port location
- Use online guides or apps like “OBD Connector” by entering your car’s make, model, and year
Why That Location Makes Sense
- Accessibility: Located within 2 feet of the steering wheel so you can plug in and scan without climbing into awkward positions.
- Safety: Inside the cabin keeps it dry and protected—no accidental unplugging while driving.
- Universal Standard: Every car sold since ’96 must include it—makes using your scanner straightforward across brands.
Classic Checklist to Find It Quickly
- Sit in the driver’s seat with a flashlight in hand.
- Slide under the dash, left and right from the steering column.
- Look above pedals and around the center console.
- Check for plastic flaps, sometimes labeled “OBD”.
- If needed, peek into the fuse-box or passenger footwell.
- Failing that, your manual or a quick search “OBD2 port + [your car model]” usually nails it.
Once You’ve Found It
Got it? Great—now you’re ready to plug in and start scanning—first step to mastering how to use OBD2 scanner! In the next step, we’ll walk you through turning your ignition on, powering up the scanner, and getting those first code readings.

Step 2: Connect and Power Up the Scanner
Alright, you’re ready to get hands-on! Here’s how to plug in and power up your OBD2 scanner like a pro:
- Car parked and powered off
First things first—make sure your car is parked, engine off, and the ignition fully turned off. Safety first! This prevents any accidental power surges or misreads when plugging in. - Plug in the scanner firmly
Locate the 16-pin OBD2 port (usually under the driver’s dashboard). Align the plug carefully—it only fits one way. Give it a gentle but firm push until it seats snugly. - Ignition = ON, engine = OFF
Now, turn the key to the “ON” position or, for push-button starts, tap the button without pressing the brake pedal. This means all dashboard lights are on and the ECU is powered, but the engine is still off. You’ll typically hear the fuel pump cycle and see the dash lights come alive—this powers up your scanner. - Scanner boots and connects
After ignition is on, your scanner should power up automatically. Wait a few seconds—it will initialize, identify the connection, and sometimes ask you to enter vehicle info like year or VIN. - Need live data? Start the engine
For basic diagnostics (reading stored codes or clearing the check engine light), ignition-on without starting is enough. However, if you want live data readings—like sensor voltages, engine RPMs, or fuel trim—you’ll need to start the engine and let it idle. - Troubleshooting connection issues
- If nothing happens, check that the plug is fully seated and aligned.
- Some scanners require the ignition to cycle OFF→ON again after first plug-in.
- For Bluetooth or Wi‑Fi scanners, confirm your phone/tablet is connected in the app before proceeding.
- If nothing happens, check that the plug is fully seated and aligned.
Why This Matters
- Ignition-On (engine-off) mode provides power to the ECU and lets you read/erase codes safely—without engine noise or moving parts interfering.
- Engine running lets you access dynamic, real-time data—essential for deeper diagnostics like identifying sensor drift or fuel trim issues.
With the scanner now powered and talking to your car’s computer, you’re all set to dive into Step 3 and start navigating menus like a champ!
Step 3: Navigate the Scanner Menu
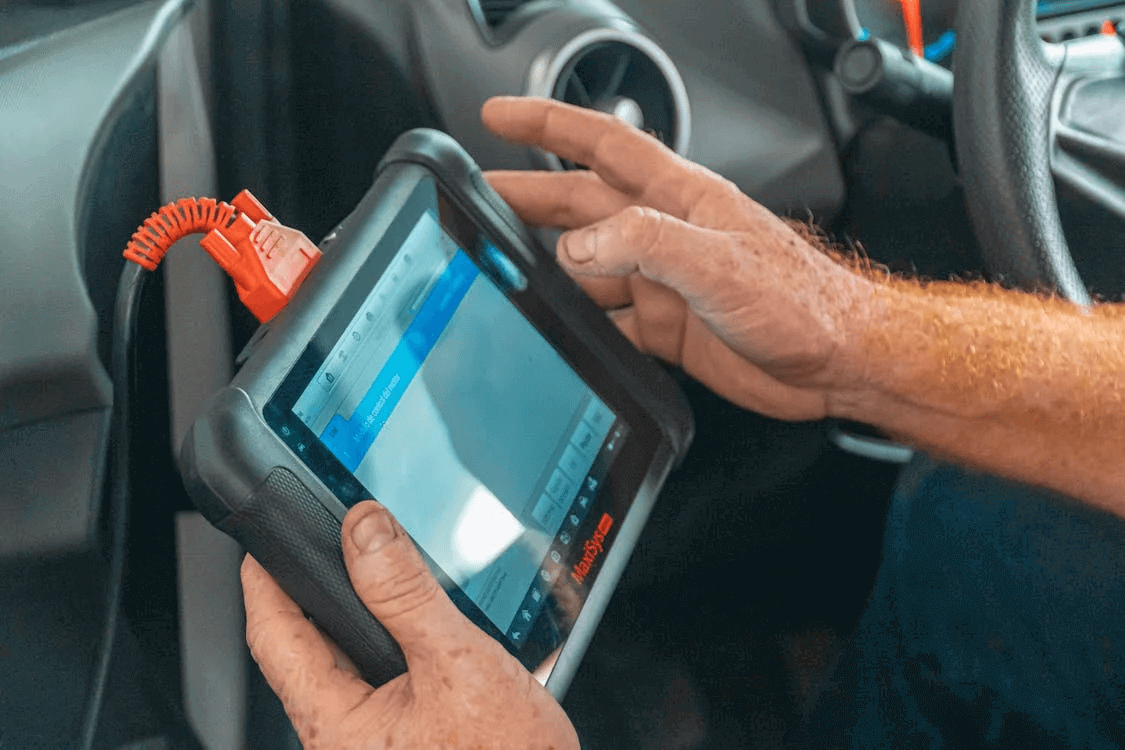
Once your OBD2 scanner is powered on and connected, it’s time to explore its menu. This part might seem a bit technical, but imagine it’s just like using an app—where simple taps or button presses get you what you need. Let’s break it down:
1. Boot-Up & Vehicle Recognition
- After powering up (with ignition ON, engine off), most scanners auto-run their boot sequence. You’ll see a prompt like “Initializing…” or “Searching for vehicle…”—just wait. If prompted, confirm your vehicle make, model, engine size, or even VIN. This step ensures accurate diagnostics.
2. Understanding the Menu Interface
- Basic handheld scanners have physical buttons—Menu, Up/Down, Enter—while modern units may use a touch screen with icons for Read Codes, Erase Codes, and Live Data. Here’s how they usually map out:
| Option | Description |
| Read Codes | Retrieves stored diagnostic trouble codes (DTCs)—your next step in identifying issues |
| Pending Codes | Notes issues that haven’t triggered Check Engine Light yet—great for early detection |
| Erase Codes | Clears the codes and resets the Check Engine Light after fixes |
| Live Data | Displays real-time sensor data—engine RPM, coolant temp, O₂ sensors |
| Freeze Frame | Shows data snapshot from when a fault occurred |
| Vehicle Info | Displays VIN or ECU data—if supported |
3. Reading Codes
- Highlight Read Codes, press Enter/Tap, and the scanner will fetch all stored and pending codes—both current and pre-fault history.
- Active codes show immediate problems, while pending ones alert you of developing issues—especially helpful to catch before lights come on.
4. Viewing Live Data & Freeze Frame
- Choose Live Data to watch metrics like RPM, throttle position, and fuel trim change in real time—it’s where experienced DIYers diagnose deeper fault trends.
- Select Freeze Frame to see a log of values from the exact moment a DTC was logged—this is critical context when interpreting codes.
5. Clearing Codes & Resetting Monitors
- After repairs, select Erase Codes. The scanner may ask to confirm—type “Yes” or hit Enter. This removes codes and turns off the Check Engine Light.
- Be aware: clearing codes also resets readiness monitors—important if your vehicle needs to pass emissions soon.
6. Advanced Features & Bi-Directional Controls
- Higher-end scanners (like Innova 5610, Autel MK808, XTOOL D9S, etc.) support ABS/SRS code reading, oil/light resets, and even sending commands to test certain components (bi-directional control).
- Modern units also allow Wi-Fi/Bluetooth connections and large touchscreens for smoother navigation .
☑️ Quick Recap
- Let the scanner boot up and recognize your vehicle.
- Use intuitive menu buttons or touch icons to select functions.
- Read codes (active & pending) to see what’s wrong.
- Monitor live data and consult freeze frame info for deeper insights.
- Erase codes after repairs, but note it resets monitors.
- Explore advanced tools if available—ABS, SRS, resets, commands.
Pro Tips for a Smooth Experience
- Always keep firmware updated to support newer vehicles.
- If your scanner gets stuck on “no communication”, double-check ignition is fully ON—the most common fix.
- Use Bluetooth or Wi-Fi for a richer, app-based experience (e.g., BlueDriver, OBDLINK MX⁺).
By mastering the menu of your OBD2 scanner, you’re not just reading error codes—you’re unlocking a powerful toolkit for diagnosing, monitoring, and maintaining your vehicle like a pro.

Step 4: Read and Interpret Trouble Codes (DTCs)
Alright, you’re connected and ready—let’s dive into those mysterious acronyms lighting up your scanner! This step is key in learning how to use an OBD2 scanner effectively.
1. Pulling Codes from the ECU
Once plugged into the OBD-II port and powered up, select “Read Codes” on your scanner. Your vehicle’s Engine Control Module (ECM) or Powertrain Control Module (PCM) immediately shares any saved Diagnostic Trouble Codes (DTCs).
These codes don’t just tell you “something’s wrong”; they provide specific fault indicators stored whenever a sensor or system falls outside normal parameters.
2. Understanding the Code Format
Each DTC is a 5-character code, like P0302. Here’s the breakdown:
- 1st character (letter): System affected
- P = Powertrain (engine/transmission)
- B = Body (airbags, climate control)
- C = Chassis (brakes, suspension)
- U = Network/comms
- P = Powertrain (engine/transmission)
- 2nd character (number): Code type
- 0 = Generic code (SAE standard)
- 1 = Manufacturer‑specific
- 0 = Generic code (SAE standard)
- 3rd character: Sub-system indicator
- Example: 1 = fuel/air metering; 3 = ignition/misfire; 4 = emissions control
- Example: 1 = fuel/air metering; 3 = ignition/misfire; 4 = emissions control
- 4th & 5th characters: Exact fault
- Such as cylinder #2 misfire, small EVAP leak, etc.
- Such as cylinder #2 misfire, small EVAP leak, etc.
For instance, P0302 decodes to Powertrain / Generic / Ignition misfire / Cylinder 2.
3. What the Codes Are Telling You
Your scanner may show codes like:
| Code | Common Meaning |
| P0171 | System too lean (bank 1) – possible vacuum leak |
| P0420 | Catalyst efficiency below threshold – catalytic converter issue |
| P0300 | Random/multiple misfires detected |
These codes pinpoint what system is involved—but not always why it happened. For example, P0171 could mean a faulty MAF sensor, vacuum leak, or low fuel pressure.
4. Using Code Details to Diagnose
Top-tier scanners (and Bluetooth apps) not only provide the code but also a brief description like—“System Too Lean (Bank 1)”. This saves a step from shredding codes onto paper and Googling later.
But if yours doesn’t supply code definitions, no worries—you can look them up using trusted sources like:
- OBD-Codes.com
- RepairPal’s DTC library
- AutoZone’s online code list
5. Assessing Severity and Next Steps
Not all codes equal disaster. Some, like a loose gas cap (EVAP leak P0442), are easy fixes. Others—like P0300 (random misfires) or P0420—can indicate serious engine or emissions issues that need prompt attention .
Here’s how to proceed:
- List all DTCs—even the seemingly minor ones. Multiple codes can be related.
- Prioritize the most urgent—misfires, catalytic converter faults, heavy emissions codes.
- Check freeze-frame & live data (especially for intermittent faults) to see conditions at the time of error.
- Research each code—look into likely causes, service bulletins, and DIY fixes.
Quick Tips for Decoding Like a Pro
- Recognize generic vs. manufacturer-specific codes. P0xxx are universal; P1xxx are brand-specific.
- Use freeze-frame data for context—like engine load and temperature when the fault was recorded .
- For persistent or complex faults, consider professional-level tools or certified mechanics.
TL;DR
- Connect your scanner, hit “Read Codes” to get 5-character DTCs.
- Decode each character to know system, code type, subsystem, and fault.
- Use descriptions, databases, and tools for precise meaning.
- Prioritize and combine codes to build your diagnostic plan.
- Freeze-frame and live data help capture how and when issues occur.
This step in how to use an OBD2 scanner is your moment of truth—when you shift from “something’s wrong” to “here’s exactly what’s wrong, and what to do next.”
Step 5: Research Fault Codes & Troubleshoot
Alright, so you’ve got your diagnostic trouble codes (DTCs) from your OBD2 scanner — great job getting here! Now comes one of the most important parts: researching what those codes actually mean and figuring out what to do about them.
1. Understand What Type of Code You Have
First off, look at how your code is structured:
- The first letter tells you the system:
- P = Powertrain (engine/transmission)
- B = Body
- C = Chassis (like brakes/suspension)
- U = Network (communication lines)
- P = Powertrain (engine/transmission)
- The next numbers give you more specifics—whether it’s a generic or manufacturer‑specific code and details like misfires, emissions, etc.
Being familiar with this format helps you know where to start digging.
2. Lookup the Exact Code Meaning
Even though your scanner might show a brief description, I always recommend cross-referencing it:
- Online databases like OBD‑Codes.com or AxleWise lay out generic P-codes and explain what they mean and possible causes.
- Manufacturer resources (like Technical Service Bulletins) are gold—especially when you’re dealing with brand-specific quirks.
This step grounds your troubleshooting in real facts and possibilities.
3. Distinguish Between Stored, Pending, and Permanent Codes
OBD2 systems categorize codes:
- Stored codes are confirmed issues that triggered the Check Engine Light.
- Pending codes mean something might be wrong, but it hasn’t activated the light yet.
- Permanent codes can’t be reset until the car runs a full test cycle after a proper repair.
If you see pending codes, don’t ignore them—they can become serious if they reappear.
4. Dive Deeper With Live Data or Freeze-Frame
If your scanner supports live data, use that to confirm if a sensor is actually giving bad readings:
- Watch real-time O₂ sensor voltages, fuel trims, temp sensors, RPMs, etc., and compare them to expected values.
- Freeze-frame data gives you a snapshot of what conditions were present when the code triggered—like engine temp or vehicle speed.
This can help isolate whether the issue is consistent or just a one-off glitch.
5. Form a Logical Troubleshooting Plan
Once you know what the code means and have live data to back it up, take these steps:
- Identify common causes linked with your specific code. For example, code P0301 (cylinder 1 misfire) could be a bad spark plug, coil, injector, or even a vacuum leak.
- Inspect visually, then test components—like using a spark tester, compressed air on injectors, or taking readings from sensors.
- Make the fix, whether that’s swapping a spark plug, cleaning an MAF sensor, or tightening a hose.
- Confirm the fix with live data or by driving to see if the code resets itself.
That’s real-world troubleshooting, using the scanner not just for reading but also verification.
6. Validate the Repair and Clear Codes
Once you’re confident the issue is resolved:
- Use the clear codes function on your scanner.
- Then either drive the car or monitor the readiness monitors via live data to ensure the light doesn’t come back on.
If the code returns or the monitor doesn’t reset, you might need to double-check your fix or repeat a particular test.
7. Use Online Communities & Forums
Hearing other people’s identical experiences and fixes can save you hours of guesswork.
TL;DR
Your OBD2 scanner gave you a code—that’s a clue, not the diagnosis. Now:
- Understand what the code type means (P, B, C, U).
- Use databases and manufacturer info to get precise definitions.
- Check if it’s stored, pending, or permanent.
- Use live data/freeze-frame to narrow down real vs false faults.
- Form and execute a testing-based repair plan.
- Clear codes and confirm the problem stays fixed.
- Leverage community knowledge for tricky or uncommon issues.
Step 6: Clear Codes After Repair
Alright, so you’ve got the repair done—sensor replaced, hose tightened, whatever was causing the traction. Now it’s time to clear the codes, and trust me, it’s just as important as diagnosing and fixing the issue. Here’s how to confidently use your OBD2 scanner to do it right:
6.1 Confirm Your Fix
Before you clear any codes, double-check that the repair is solid. Clearing codes without actually fixing the problem is like hitting “reset” in your video game without defeating the boss—it might vanish for a moment, but it’ll come roaring back.
6.2 Plug In & Power Up
- Plug your scanner in under the dash and switch the ignition to “ON” (engine off).
- Navigate to the “Clear Codes” or “Erase Codes” menu—every scanner has its quirks, but the wording is usually pretty intuitive.
- Confirm the deletion. The scanner will communicate this to your car’s ECU and wipe out the stored DTCs.
6.3 Watch for the Check Engine Light
Once the codes are cleared, the Check Engine Light (CEL) should extinguish immediately. Nice feeling, huh? But hold up—you’re not done yet.
6.4 System Reset & Readiness Monitors
You’ve reset more than just the warning light. Your scanner also clears Freeze Frame data and resets all system readiness monitors—those are the little tests your vehicle runs to ensure everything’s working right, especially for emissions.
Want to pass an emissions test? You’ll typically need to complete a drive cycle to let these monitors finish their routines. Depending on your vehicle, that could take 20–150 miles of mixed driving.
6.5 Take It for a Drive
- Idle for a couple of minutes—your car’s waking up sensors.
- Highway cruise (about 10–15 miles) to let systems like O₂ and catalytic efficiency monitor work.
- Stop-and-go for another 10–15 miles so things like EVAP systems get checked.
After this, your readiness monitors should show “Ready” when you check again with the scanner.
6.6 Verify with Live & Readiness Data
Use your scanner’s menu to check:
- Pending or active codes — no surprises here.
- Readiness status — ideally, most monitors say “Ready” with maybe one allowed to be “Not Ready.”
6.7 What About Permanent Codes?
Some newer cars have permanent DTCs that won’t erase right away. These stay flagged until the system runs three fault-free drive cycles. Afterwards, Mode $04 erases them—or they clear automatically around the fourth successful cycle—without any scanner input.
6.8 Best Practices
- Save your codes before deleting them—just in case.
- Use your scanner to verify readiness before any testing or smog check.
- Make sure your scanner is firmly connected while erasing—if it disconnects mid-reset, it could mess with your ECU.
TL;DR
- Fix the issue first—don’t just erase it.
- Use your OBD2 scanner’s “Clear Codes” function.
- Notice the CEL goes off, but prep for a drive.
- Complete a proper drive cycle so readiness monitors reset.
- Re-scan to confirm no codes and good readiness status.
- Enjoy that fresh-slate feeling—with full confidence your car is roadworthy!
Knowing how to use an OBD2 scanner not only saves you money—it helps you understand your vehicle like a pro. Clearing codes properly means solving the issue, not hiding it.
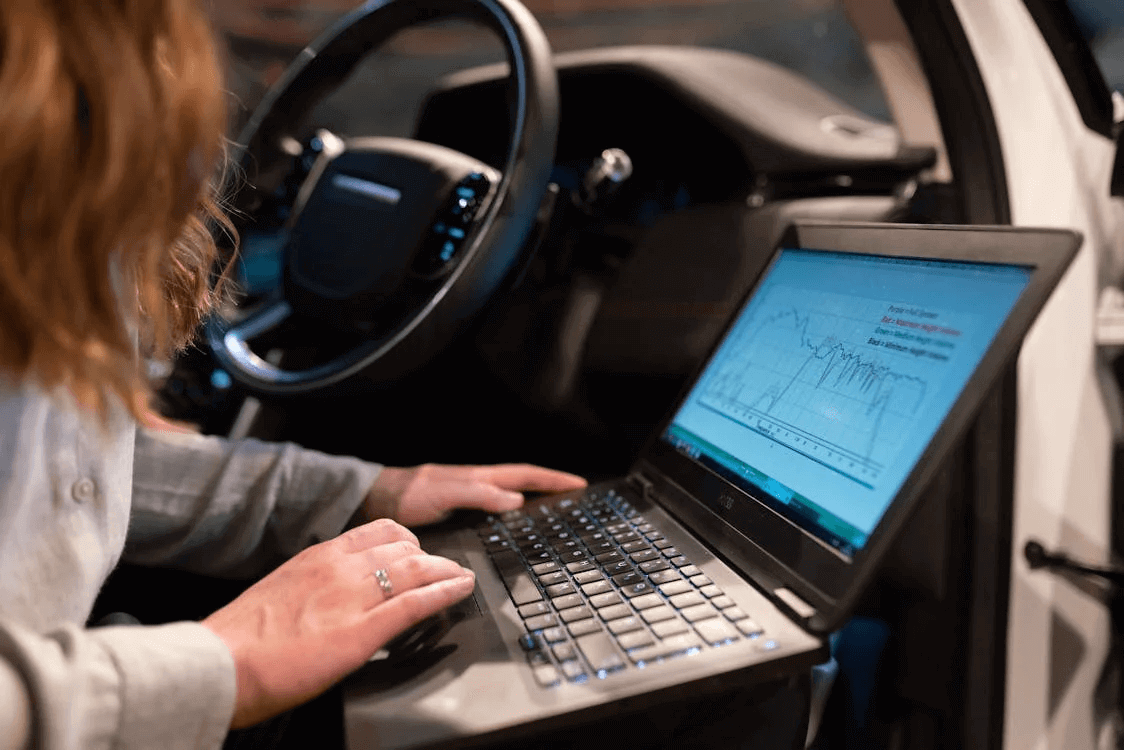
Step 7: Monitor Live Data for Advanced Diagnostics
If your scanner supports “Live Data,” you’re in for a treat. This feature lets you monitor real-time engine performance metrics such as:
- RPM (Revolutions Per Minute)
- Short-term & Long-term Fuel Trim
- Coolant Temperature
- O2 Sensor Voltages
Live data is particularly useful for:
- Diagnosing intermittent issues
- Verifying a repair was successful
- Checking sensor functionality
For example, if your oxygen sensor is supposed to fluctuate between 0.1V and 0.9V and you see a flat line, it’s likely faulty.
Using Bluetooth & App-Based OBD2 Scanners
Many scanners no longer need a screen. Bluetooth-based OBD2 tools plug into the port and sync with your smartphone via a dedicated app.
Benefits include:
- Easier navigation and user interface
- Detailed code explanations
- Maintenance reminders and repair reports
Steps to use:
- Plug in the Bluetooth scanner
- Pair it via Bluetooth to your phone
- Launch the app (e.g., Car Scanner, Torque, OBDFusion)
- Follow prompts to scan your vehicle
These are perfect for drivers who want modern convenience with smart diagnostics.
Choosing the Right OBD2 Scanner in 2025
The market has grown exponentially, and there’s an OBD2 scanner for every type of user. Here’s a quick breakdown:
| Brand | Top Models | Best For | Key Features | Why Choose This Brand |
| Autel | – AutoLink AL519 – MaxiCOM MK808 – MaxiSys MS906 | Beginners to Professionals | – Live data, freeze frame – Service functions – ECU coding & key programming (MS906) | Industry leader with reliable diagnostics, regular updates, and tools that scale with your skill level. |
| Launch | – CRP129E – X431 Pro Mini | Intermediate to Advanced Users | – Full system diagnostics – Bi-directional control – ECU coding & special resets | Broad car compatibility, great value for advanced diagnostics, and frequent software updates. |
| Foxwell | – NT301 – NT809 | DIYers on a Budget | – Real-time data – Service resets – Touchscreen (NT809) | Budget-friendly, rugged, and ideal for reading/clearing codes with reliable functionality. |
| Thinkcar | – Thinkdiag2 | Mobile & App-Based Diagnostics | – Bluetooth connectivity – Active tests – Cloud updates – Smartphone/tablet interface | Sleek, modern tools with app-first experience and powerful diagnostics for tech-savvy car owners. |
Tips to Get the Most Out of Your OBD2 Scanner
Here are a few bonus tips to make your experience seamless:
- Update your scanner’s firmware regularly to ensure compatibility with newer car models.
- Use a stable connection — some cheaper scanners may disconnect randomly.
- Don’t rush to clear codes. Always make sure the issue is fixed.
- Track recurring issues. Some scanners let you save DTC logs for comparison over time.
- Use manufacturer-specific scanners (e.g., FORScan for Ford) if you want deeper diagnostic access.
Final Thoughts: Taking Control of Your Vehicle’s Health
Learning how to use an OBD2 scanner empowers you to understand, diagnose, and even fix your vehicle’s issues without always relying on a mechanic. Whether you’re chasing down a check engine light or monitoring your car’s performance, this device is an essential tool in your glovebox.
In a world of rising repair costs and vehicle complexity, knowledge truly is horsepower. Invest in a good OBD2 scanner and start diagnosing like a pro today!